Sunday, November 2, 2008
Lesson #3 - Chords
Hold your hand like you're passing a baton. Note the thumb will be flat and pointing up the guitar. Also note that your fingers are tilted/angled, not perpendicular. This position gives a natural shape to your hand and also allows your hand to stretch out longer. Again the wrist of this hand is also straight if possible. An 'F' barre chord or a 'G' chord may need some angle with your wrist but the others C, D, E, etc. should allow a straight wrist. Remember, like the previous lesson, try to have the finger right behind the frets.
Lesson #2 - Single String Fingering, Pressing the String
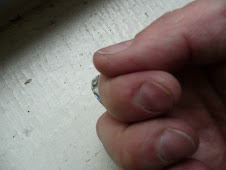
Press down with the tip of your finger. Note the thumb position on the back of the neck is generally pointing to the head of the guitar. Place the finger right behind the fret, as close as you can make it. This will produce the cleanest sound with the least amount of pressure needed. The finger will be pressing down and the thumb on the other side of the neck will be pressing back. They will be equal and opposite forces and when used correctly, there's little involvement with the rest of the arm and shoulders. That way you are using the least number of muscles and those most efficiently.
Guitar Lessons, Lesson #1 - The Pick
Learn these good basic habits to start and you'll find playing easier. You also will avoid serious problems later on.
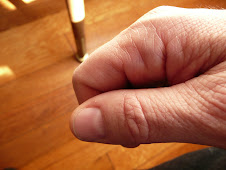
Hold the 1st digit of your 1st finger under and behind the thumb so that they form a right angle. These 2 fingers are the only ones holding the pick. The other fingers and rest of the hand are relaxed. This technique gives the most surface area which leads to the most control and stability.
Slip the pick between the 2 fingers. The wrist should also be straight from the arm to the back of the hand.
Subscribe to:
Comments (Atom)
Lesson #1 - The Pick
Hand w/o Pick

w/Pick


Wrist


